
Revive Your Pursonic i7 Pro: The 5-Minute Battery Swap Guide
Is your Pursonic i7 Pro losing its cleaning stamina? Don’t rush to buy a new vacuum cleaner! Replacing the battery is the smartest, most cost-effective way to restore its “like-new” power. Follow this step-by-step guide to get it back in action—no tech degree required.
🛠️ What You’ll Need

- New Battery: Ensure it is specifically compatible with the Pursonic i7 Pro.
- Phillips Screwdriver: Size #00 or #0 usually works best.
- Workspace: A clean, flat surface.
- Anti-static wrist strap: A pro touch to protect the electronics.
⚠️ Safety First
- Power Down: Ensure the vacuum is OFF and disconnected from the charging dock.
- Cool Off: Let it rest for 10 minutes after use to avoid burns.
📝 The Replacement Process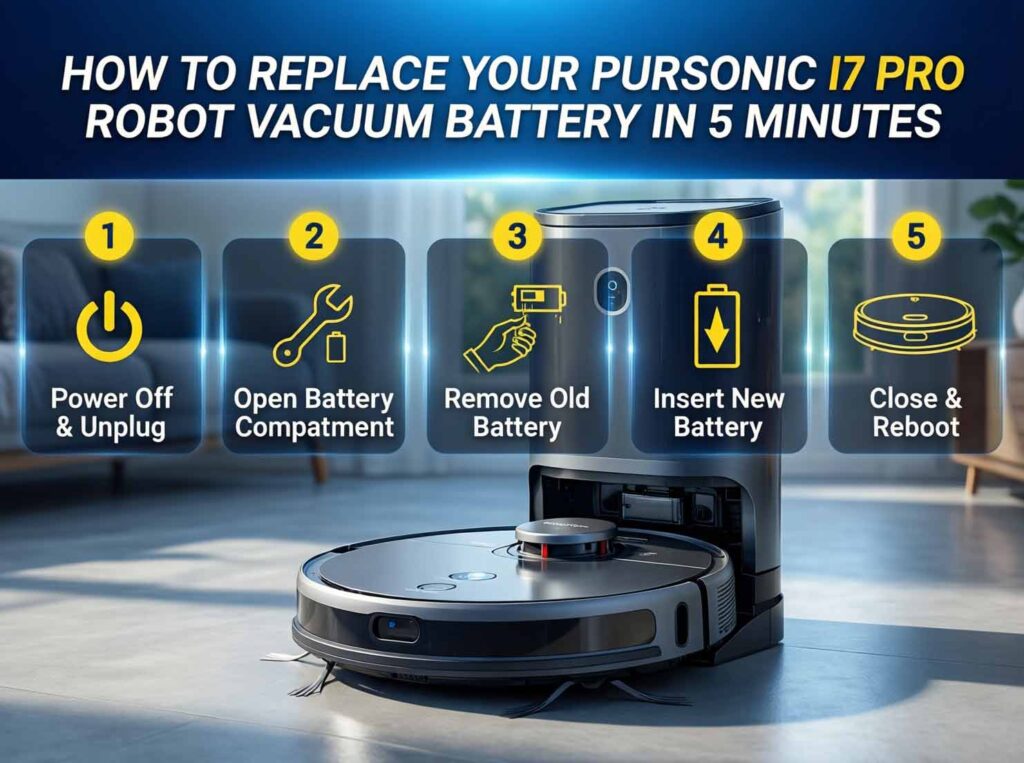
Step 1: Prep the “Patient”
Press the power button to turn it off. Flip the vacuum over so the bottom is facing up.
- Pro Tip: Remove the main brush and side brush to clear your workspace. This is also a great time to pull out any tangled hair!
Step 2: Access the Pursonic i7 Pro Robot Battery Bay
Locate the battery compartment (usually near the rear or center of the chassis).
- Remove the 2-4 small Phillips screws securing the cover. Keep them in a small bowl so they don’t roll away!
- Gently lift off the plastic cover panel.
Step 3: Disconnect the Old Battery
Look for the wiring harness connecting the battery to the motherboard.
- Crucial: Do NOT pull on the wires! Grip the plastic connector head firmly and pull it straight out.
- Once disconnected, lift the old battery out. Take a quick mental note (or a photo) of how it sits.
Step 4: Install the New Power Source
Place your new, compatible battery into the compartment in the exact same orientation as the old one.
- Reconnect the plug: Align the pins carefully and push the connector firmly into the socket until you hear or feel a satisfying “click.”
- Give it a gentle tug to ensure it’s secure.
Step 5: Reassemble & Charge
- Snap the battery cover back into place and tighten the screws (don’t over-tighten!).
- Reattach your brushes and flip the vacuum back over.
- Place it on the charging dock. The indicator light should glow, signaling a successful connection.
- Important: Let it charge fully (3-4 hours) before the first run to calibrate the battery management system.
💡 Battery Care & Pro Tips
- The 20% Rule: For the longest lifespan, try to recharge when the battery drops to 20-30%. Avoid letting it die completely (0%) regularly.
- Storage Mode: If you won’t use the vacuum for a month+, charge the vacuum battery to 50-60%, turn it off, and store it in a cool, dry place.
- Stay Active: Use the vacuum at least once every 2-3 months to keep the battery chemistry healthy.
🚨 Quick Troubleshooting
- Won’t Turn On? Double-check that the battery connector is clicked all the way in. It’s the most common culprit!
- Not Charging? Wipe the charging pins on the vacuum and the dock with a dry cloth to ensure a clean connection.
- Still Stuck? If issues persist, contact our support team with your order number—we’re here to help!