
Cordless Drill/Driver vs Impact Driver: Which Do You Need?
The two most commonly used tools are my power drill and my driver. They are useful for carpentry, but also for families of various improvements and repairs around the house. Let’s take a look at the basics of drilling and driving, why do I recommend having these two tools, and how to use an electric drill and impact drive.
Power Drill Basics
Most of us are familiar with a drill. It holds a bit and you use it for drilling a hole. It has a chuck that tightens down jaws to hold a bit in place. Most drills today have a keyless chuck that you can tighten without needing a chuck key.
To use a keyless chuck, make sure the jaws are wide enough to hold the bit. To open them up, just unscrew the chuck and you’ll see jaws open.
Insert a bit. It doesn’t need to drop all the way in, just deep enough for the jaws to grab it. Then tighten the chuck by hand. I usually do this all in one motion by holding the bit and the chuck in my left hand and slowly squeeze the trigger until it’s tight.
Your drill will have a switch that reverses the spinning rotation, either forward or reverse. Once the bit is in place pull the trigger. If the bit is wobbly, you don’t have it in right.
If you have a drill that uses a chuck key, you will stick it into a hole in the side of the chuck and crank it down tight. My drill press uses this kind of system. I’ll discuss the drill press in a future basics video and article.
Power Drill Features
Variable speed trigger
Most drills are variable speed drills. You control the speed of the motor just by squeezing the trigger. The more you squeeze, the faster the bit spins. For drilling holes, I use this feature to get a hole started. If you start at high speed, the bit might wander around until it grabs.
You also need a slow speed to drive screws or other fasteners with a driver bit. A fast speed could cause the screw to strip, or even break.
Gear selector
Some drills also have a gear switch. On my drill, gear one has a slower speed, but more torque or twisting power. That would be great for driving say, a lag screw into a stud. But for driving screws or bolts, I usually use my impact driver instead. More on that later.
For most drilling, I keep my drill set on gear 2, the higher speed setting. This works great for drilling most holes.
Clutch
Another feature most drills have is a clutch which can help when driving screws. By adjusting this dial, the drill will stop driving when it reaches a certain torque. This is handy when want to be careful not to drive a screw too deep. For example, if you are drilling into drywall, you need to be careful not to break the paper covering. Run a couple of tests to get the correct setting, then you can drill lots of screws without worry. It’s also useful for driving pocket screws and preventing them from stripping or blasting through the wood.
Usually, I keep the clutch off and have it set to the drill setting. If I only have a couple screws, I just slowly drive the screw into place.
Battery
Most likely you will want the convenience of a battery powered drill. Today’s batteries can do a lot of drilling and driving on a single charge, and they charge pretty quickly. You should always have two batteries so you can have one in the charger ready to go.
While not as handy as a RYOBI BHT-2600 Power Tool Battery operated drill, you can buy corded drills. These are good to have if you need to do a lot of heavy, intensive drilling and driving and don’t want to risk any downtime waiting for a battery to charge.
Drill and Driver Bits
Twist drill bits
The most common type of drill bits are twist drill bits, sometimes called HSS or high speed steel bits. These are inexpensive and readily available at hardware stores and home centers. They work well for wood, metal and other materials. One drawback is that it may be difficult to keep them from wandering from where you want a hole to b
A better choice for woodworking are brad point bits. The point at the tip allows you to position the bit precisely where you need to drill and spurs on the sides of the brad point cut into the wood cleanly. Brad point bits bore a nice clean holes, but they are more expensive.
Spade Bits
A spade or paddle bit has a point to get it started and a wide blade for making large holes. Unfortunately, a spade bit is pretty aggressive and can leave a pretty ragged, splintered cut. They are great for rough construction work, maybe boring holes in studs for conduit, but not the best choice for woodworking.
Forstner Bits
When you need to drill large, clean, flat bottomed holes, a Forstner bit is the best option. It has a starter brad point and a cutter around the rim. Unfortunately, Forstner bits require a fair amount of force to push them into wood and usually used on a drill press., You can use them with a hand-held drill, but it can be tricky. Your best bet is to clamp your board down to prevent it from spinning loose. Also, as a rule of thumb, the bigger the bit, the slower you want the drill to spin.
Driver Bits
One of the most common uses for a drill all around the house, not just in the workshop, is as a driver. Driving screws is much easier and faster with a drill than by hand. Driver bits come in any type of screw head you need to use, Philips, Star drive, square drive, etc. They all have a hex shaped shank that fits into your chuck just like any other bit.
You can get long drivers that fit directly into your drill, or you can get these little tips that fit into a driver bit holder. There’s a magnet inside the sleeve that holds the bit in place. I prefer using these.
Bit sets
In general, I don’t see any big advantage to spending a lot of money on high-end, expensive drill or driver bits. You can get a huge set with hundreds of bits for under $30. I like to have a huge assortment on hand so I can always find the size I need without having to make a special purchase. In the case of bits, I believe in quantity over quality.
There are a lot more types of drill bits and drivers than I mentioned in this article, but these are mostly what I use.
Power Drill Techniques
How to drill a hole
There isn’t a lot to know about drilling a hole. Always press the bit against the wood before pulling the trigger. I usually like to start slowly until the bit feels like it’s starting to sink, then speed it up. Keep the drill running as you back it out.
Use an awl to start a hole
If you don’t have brad point bits and need to drill a hole in a precise location, create a divot first using an awl or center punch to get the bit started and keep it from slipping or wandering. If you need to make a large diameter hole, it can be helpful to drill a smaller guide hole first.
Pilot holes
Sometimes, you don’t need to drill a hole to insert a screw. On soft wood or rough construction projects you can just power them into place. But for most woodworking projects you will get cleaner, more accurate results if you drill a pilot hole first. Installing hinges without drilling holes would be a nightmare. For hardwood, driving a screw without a hole can be nearly impossible: you risk splitting the wood or even breaking the screw. Plus, a screw will hold stronger when its threads are cutting into the sides of a hole, instead of pushing the wood fibers apart.
Depth stop
There are times when you want to stop the drill at a certain depth. Say you want to attach legs to the underside of a table top. Blasting all the way through would be disastrous. Instead, wrap a piece of tape around the bit where you want to stop drilling.
What size bit to use
Rather than fussing with the actual dimensions of the bits and screws, I just find a drill bit that is about the same diameter as the shank of the screw you want to use. Hold the bit and screw together and eyeball it. With the drill bit in front of the screw, you should only see the threads. It doesn’t have to be exact, just make sure you are comparing the bit to the shank of the screw and not the threads.
Countersinking
For a clean look, with the head of the screw flush or slightly below the surface of the wood, you can use a countersink bit after drilling your hole to make a cone shaped indentation for the head of the screw. Just make sure you are using regular wood screws with a beveled head rather than a round or pan head screw.
Drilling straight
An easy way to keep the drill at a right angle to your workpiece is to screw a couple of scrap boards together and use them as a guide.
Using a backer board
A common problem with drilling a hole all the way through a board is that is can blast through the other side, causing splintering. To prevent this, simply clamp a board to the exit side and fool the bit into thinking the workpiece is thicker than it is! This is very useful when drilling holes for drawer pulls or cabinet knobs.
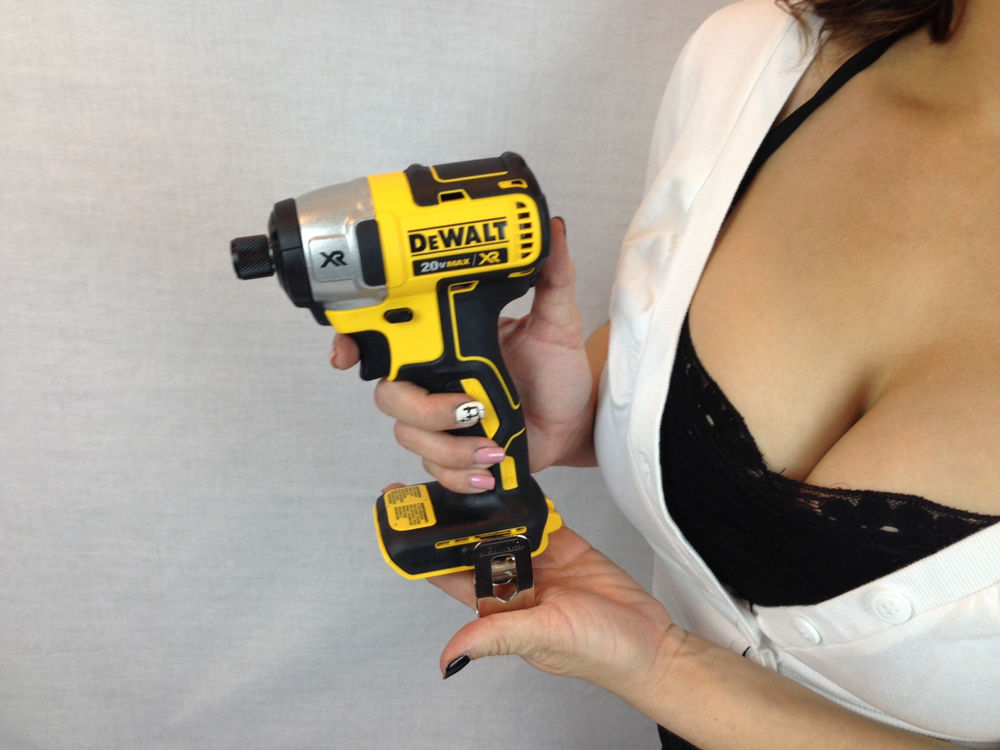
Impact Driver
Everything I’ve discussed in this article can be accomplished with just a drill, and that’s exactly what I used for years. Until I discovered the impact driver!
An impact driver is only for driving screws or bolts. You can’t drill holes with it. It doesn’t have a chuck with jaws like a drill, but instead has a locking, quick-change collet that holds standard hex-shank drivers.
Installing bits
To install a driver bit, just pull back on the collet, drop the bit in, and release it. It has a variable speed trigger like a drill, but instead of just spinning, it also delivers rapid impact blows in the direction it’s spinning. This gives the tool way more torque than a drill and can drive screws into super hard wood or other materials with very little effort.
Driving screws
Use the impact driver just like use a drill. When the screw gets close to being fully seated, you can slow down the driver and see it slowly torquing into place. With an impact driver, the tip of the bit stays in the head of the screw and doesn’t slip out the way a drill can. If you ever use Phillips screws you know how frustrating it can be to ruin the head of a screw and not be able to continue. An impact driver can also help remove screws whose heads are damaged. Plus, it’s really handy to drill holes with a drill and then quickly switch to the impact driver to drive the screws.
I highly recommend owning both a drill and an impact driver. In fact, manufacturers often sell them paired in kits. My set, complete with two batteries cost about $130.
Conclusion
There are a lot of other types of drills and bits, but I hope this article and video have been helpful to get you familiar with the basics. My drill and driver aren’t the sexiest tools in my shop, but they get used all the time. In fact, they are the only tools I don’t have dedicated storage spaces for. They are always on one of my workbenches within reach. And trust me, once you get an impact driver, you will wonder why you waited!
Did you enjoy this post? Why not leave a comment below and continue the conversation, or subscribe to my feed and get articles like this delivered automatically to your feed reader.
Comments
No comments yet.
Sorry, the comment form is closed at this time.